一、XML 是什么
XML: 可扩展标记语言(eXtensible Markup Language),通俗来说,是一个.xml为后缀名的文档类似于html,被设计为传输、存储数据。
1 |
|
-
重点在传输、存储数据,重点在数据的内容,而非显示数据,显示数据交给HTML去做
-
XML 是独立于软件和硬件的信息传输工具。
-
XML 文档仅仅只是包含纯粹的信息,需要程序员编写软件或者程序,才能传送、接收和显示出这个文档。
-
避坑指南:请将xml文档保存为encoding指定的编码
二、XML用途
-
XML 把数据从 HTML 分离,从而配合JavaScript实现HTML中动态显示数据
- XML存储数据
- HTML显示数据
-
相当于一个标准,不同的平台、应用程序之间使用XML交换数据
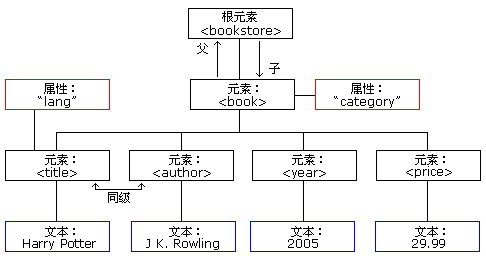
三、XML 是一棵树
1 | <!-- This is a comment --> |
-
XML 属性值必须加引号
- book 标签有category属性
- "COOKING"是category的属性值,必须加引号
-
XML标签大小写敏感
-
注意区分元素与属性
和 都有 元素内容,因为他们包含其他元素。 元素也有属性(category=“CHILDREN”)。 、<author>、<year> 和 <price> 有<strong>文本内容</strong>,因为他们包含文本。</price></year></author> 1
2
3
4<person sex="female">
<firstname>Anna</firstname>
<lastname>Smith</lastname>
</person>1
2
3
4
5<person>
<sex>female</sex>
<firstname>Anna</firstname>
<lastname>Smith</lastname>
</person>在第一个实例中,sex 是一个属性。在第二个实例中,sex 是一个元素。这两个实例都提供相同的信息。
在 HTML 中,属性用起来很便利,但是在 XML 中,应该尽量避免使用属性,推荐使用元素
-
属性不能包含多个值(元素可以)
-
属性不能包含树结构(元素可以)
-
属性不容易扩展(为未来的变化)
-
-
元数据(有关数据的数据)应当存储为属性,而数据本身应当存储为元素!!!
1 | <messages> |
上面的 id 属性仅仅是一个标识符,用于标识不同的便签,它起作用的方式与 HTML 中 id 属性是一样的。
-
XML中的转义字符
- < 变为 <
- > 变为 >
- & 变为 &
- ’ 变为 &apos
- " 变为 "
-
XML中的空格会被保留
-
XML中以LF存储换行
四、实战
4.1 目的
实现将如下的xml文件渲染到一个index.html中
1 | <!-- This is a comment --> |
4.2 步骤
4.2.1 新建bookstore.xml
将上述文件内容写入bookstore.xml中
4.2.2 新建index.html
1 | <html> |
4.2.3 将上述两个文件放在同一目录下
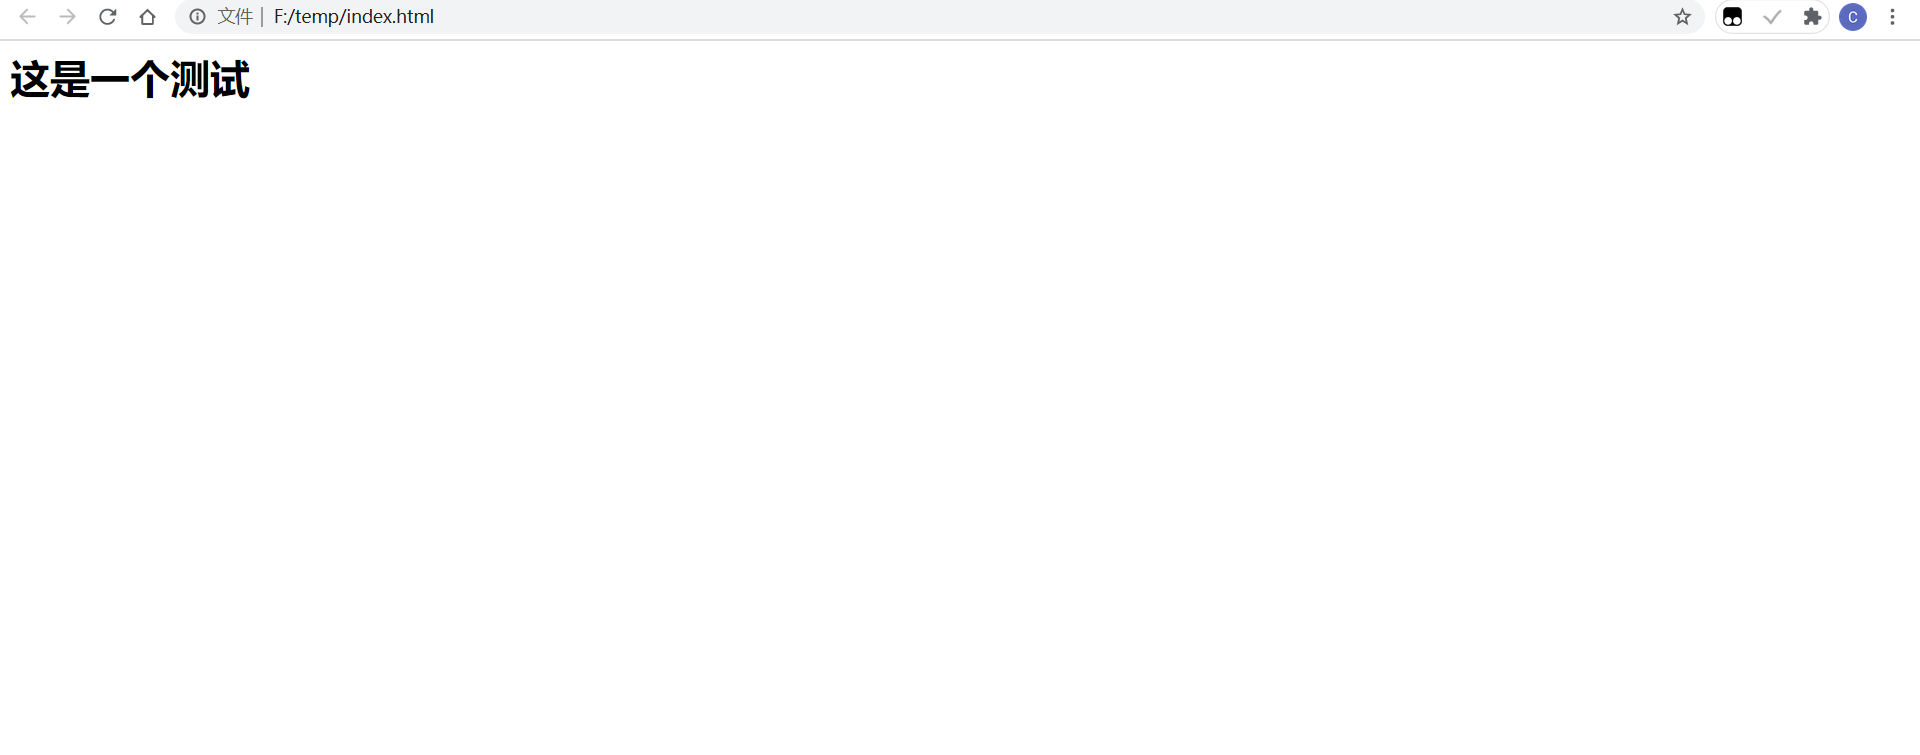
双击index.html,在浏览器中打开,会失败,如下图:
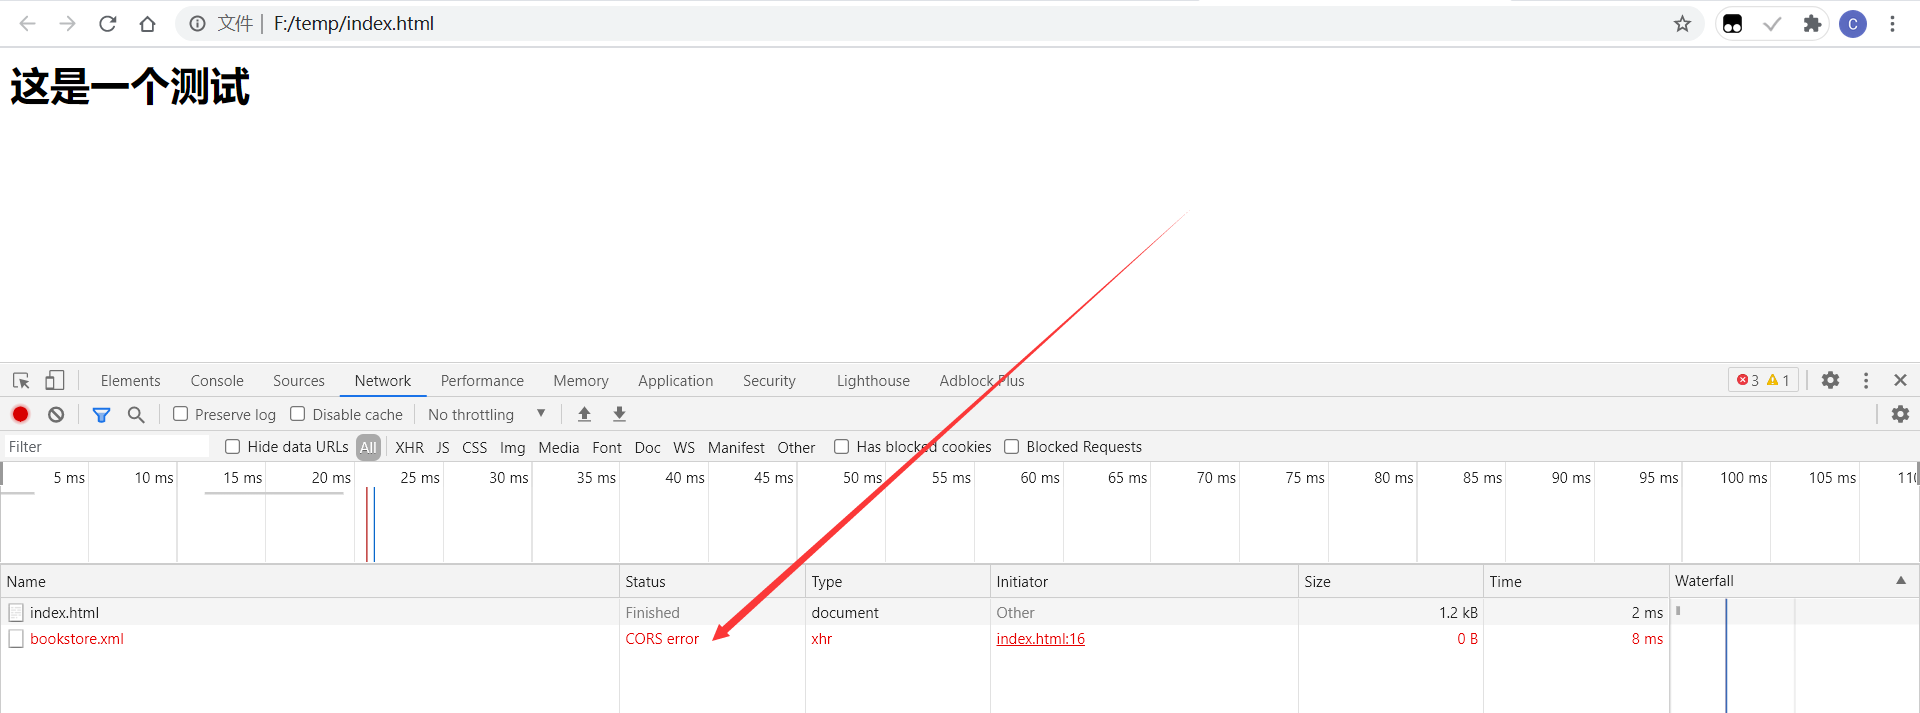
按住F12,打开调试面板,并刷新页面,得到
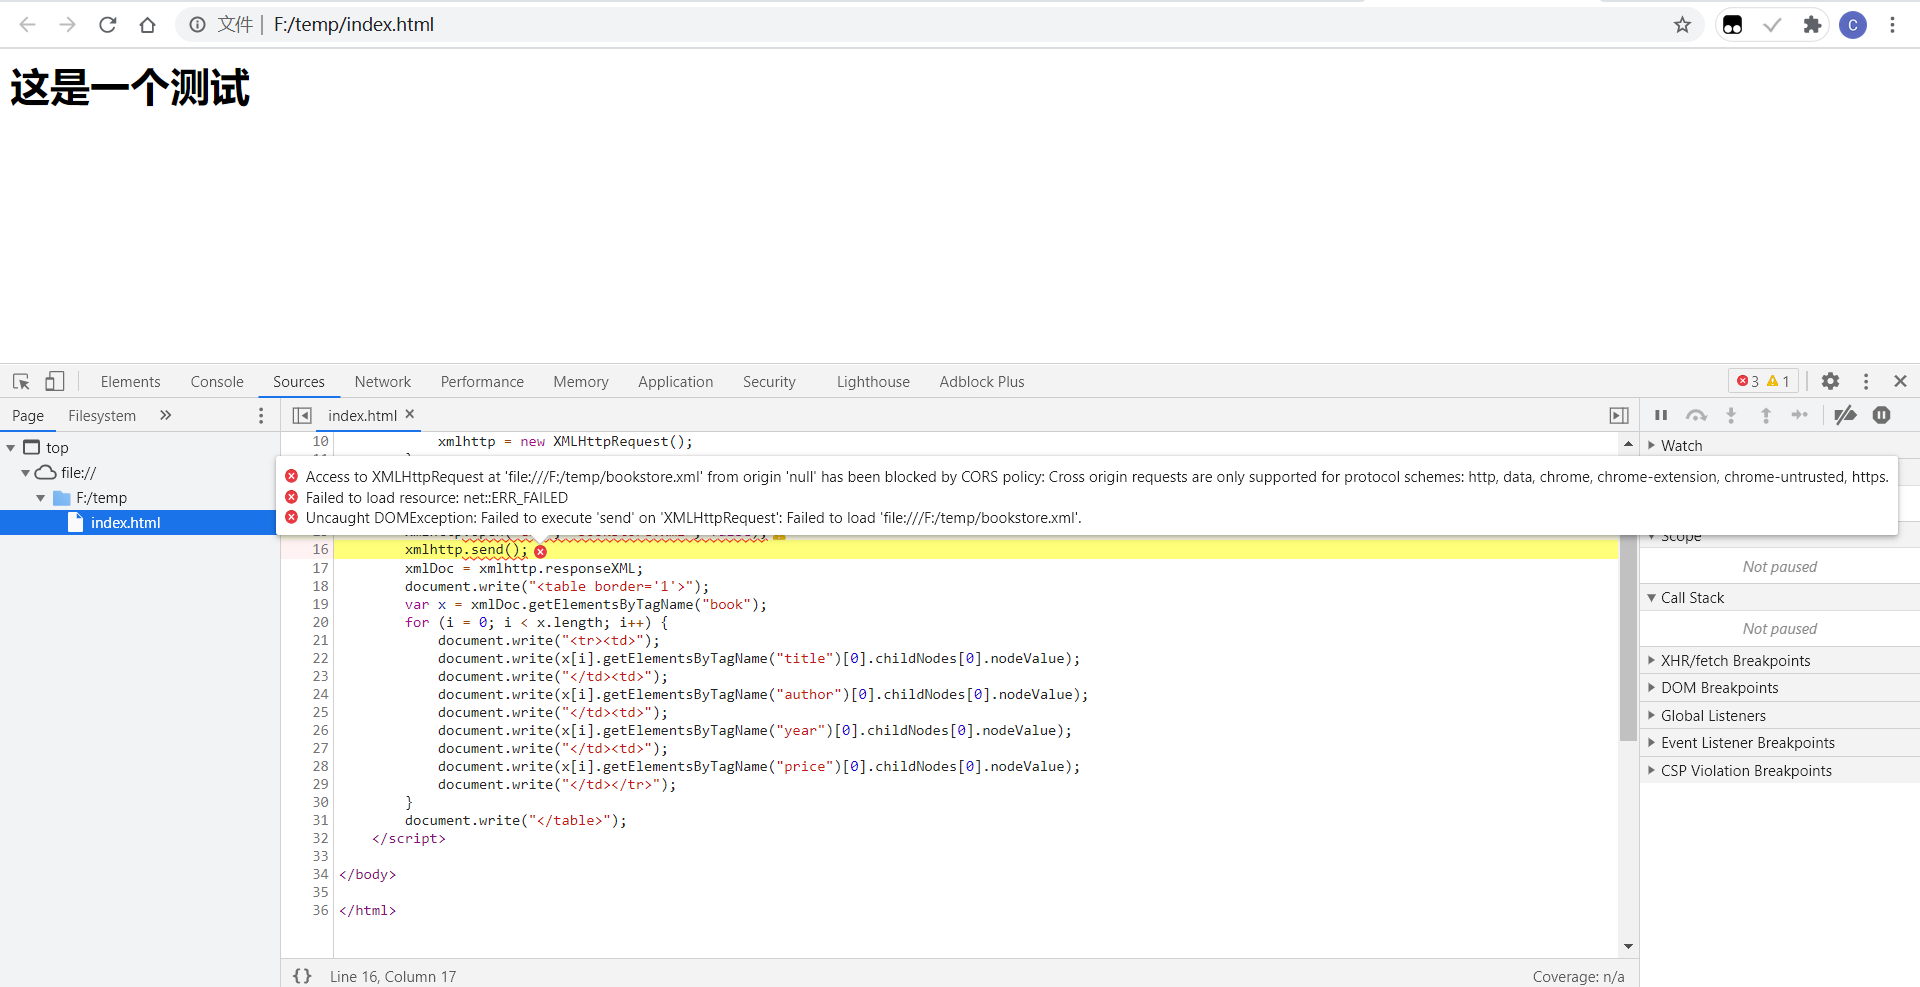
-
Access to XMLHttpRequest at ‘file:///F:/temp/bookstore.xml’ from origin ‘null’ has been blocked by CORS policy: Cross origin requests are only supported for protocol schemes: http, data, chrome, chrome-extension, chrome-untrusted, https.
-
Failed to load resource: net::ERR_FAILED
-
Uncaught DOMException: Failed to execute ‘send’ on ‘XMLHttpRequest’: Failed to load ‘file:///F:/temp/bookstore.xml’.
很明显,Cross-origin resource sharing(跨站资源共享失败),也就是说,根本没有拿到bookstore.xml这个文件。
-
原因分析:
Cross origin requests are only supported for protocol schemes: http, data, chrome, chrome-extension, chrome-untrusted, https.
-
因为直接双击index.html 使用的是FTP协议
4.3 问题解决
采用python + Flask 搭建一个小的网站进行测试
网站目录结构如下:
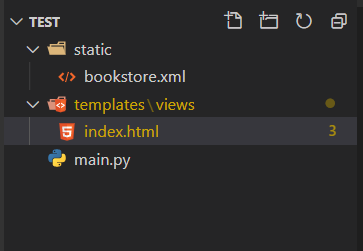
-
bookstore.xml 文件内容不变
-
index.html文件如下:
1
2
3
4
5
6
7
8
9
10
11
12
13
14
15
16
17
18
19
20
21
22
23
24
25
26
27
28
29
30
31
32
33
34
35
36
37<html>
<h1>
这是一个测试
</h1>
<body>
<script>
if (window.XMLHttpRequest) {// code for IE7+, Firefox, Chrome, Opera, Safari
xmlhttp = new XMLHttpRequest();
}
else {// code for IE6, IE5
xmlhttp = new ActiveXObject("Microsoft.XMLHTTP");
}
// 改了这里
xmlhttp.send();
xmlDoc = xmlhttp.responseXML;
document.write("<table border='1'>");
var x = xmlDoc.getElementsByTagName("book"); // 拿到所有的book标签
for (i = 0; i < x.length; i++) {
document.write("<tr><td>");
document.write(x[i].getElementsByTagName("title")[0].childNodes[0].nodeValue);
document.write("</td><td>");
document.write(x[i].getElementsByTagName("author")[0].childNodes[0].nodeValue);
document.write("</td><td>");
document.write(x[i].getElementsByTagName("year")[0].childNodes[0].nodeValue);
document.write("</td><td>");
document.write(x[i].getElementsByTagName("price")[0].childNodes[0].nodeValue);
document.write("</td></tr>");
}
document.write("</table>");
</script>
</body>
</html> -
main.py 文件如下
1
2
3
4
5
6
7
8
9
10
11from flask import Flask, render_template
app=Flask(__name__)
def hello_flask():
return render_template('/views/index.html')
if __name__=='__main__':
app.debug=True
app.run(host='127.0.0.1',port=5000)
命令行中使用python运行main.py开启服务器:

接着在浏览器地址栏中输入127.0.0.1:5000, 使用5000端口:
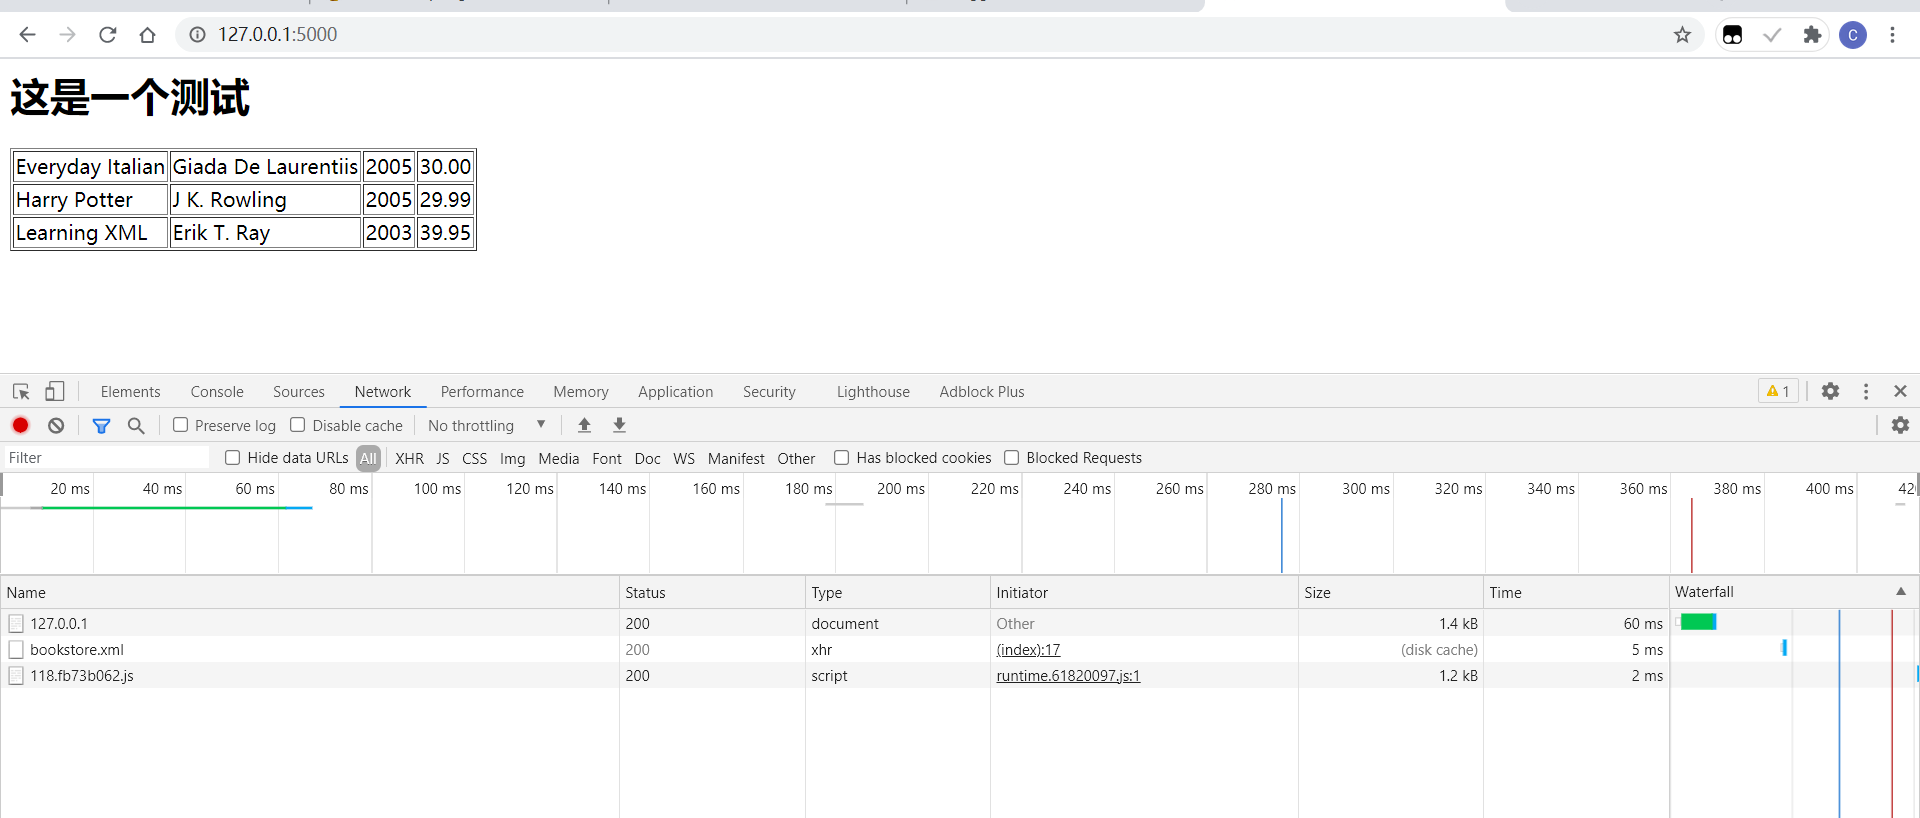
可以看到文件正确的被访问,xml文件也被正确解析。
我将test文件夹改名为xmlTest上传到了github,可自行下载运行测试。